
Blacksmithing
and Cutlery
by Gérard HEUTTE


|
|
 Caulking a folder axis

|
When you assembly a "Piedmontese" style knife, one
of the major difficulties remains the
caulking of the axis.
The most frequent problem is the blocked blade! ! !
Here is how I proceed...
 Principle
Some sketches are enough to show the principle.
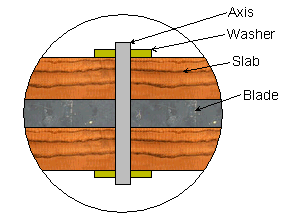
The pivot before the operation of hammering.
|
|
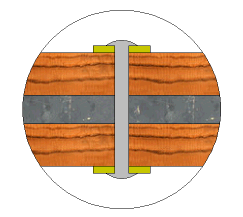
The pivot after caulking.
|
A soft iron rod is used as an axis. The wood must be protected by two
brass (or steel) washers. During the hammering with a ball-peen hammer, the
iron of the axis will be crushed against these washers.
 Equipment and materials
You will need few things easy to find:
> A ball-peen hammer which can be made from a small standard hammer
with the help of an angle grinder (see below).
> Iron axis. I generally use a rod of 3mm diameter.
Many "sources" are possible: Welding rods for arc welding, nails...
> Brass or steel washers, internal diameter of 3.2 mm.

Small ball-peen hammer made from a junk hammer.
|
|

The folder in detail parts.
|
 Realization
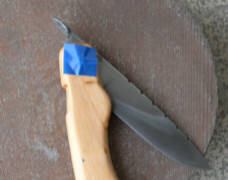 Prepare the axis, clean it then cut it.
It is necessary to let it exceed on each side by a length of about 0.5mm to 0.8mm.
To avoid the fall of the axis and the washer of the lower side,
I fix them below with a piece of adhesive (see
opposite). If not, in general, the axis does not move, but the
washer slips permanently.
Take support on a hard surface (vice, anvil...)
Start to caulk the axis by hammering in diagonal
with the ball-peen hammer on the circumference of the axis.
It is necessary to well control the movement of the hammer to
hit at 45° as on the sketch below.
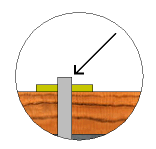
Angle of striking...
|
|
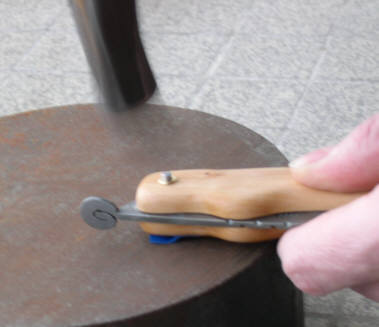
The same one in live.
|
It is better making some small dry blows rather than a hard and strong strike!
NB: Do not strike on the end. Otherwise the blade will be blocked!
Once the first side is shaped (like a mushroom head), return the knife.
Remove the adhesive and caulk the second end of the axis.
Work on the two ends alternatively in order to obtain a good
symmetry and to tighten the assembly gradually...
If the blade is too free in the handle, type delicately at the end of the axis.
Attention, the produced effect is fast and no possible reverse way!
 Result
Here is the caulked rivet seen closely:

| | |


